Topic #12 – Images
The basics
You all know what an image is.
But do you know how images are represented in memory?
Activity
Discuss with other students and come up with a way to represent images in memory.
Theory
If you consider the image below.
We have lots of different colors.

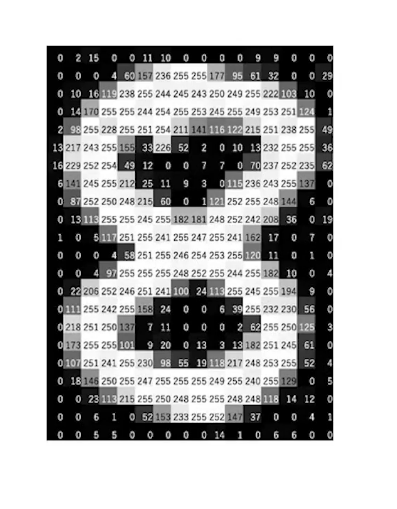
If we zoom on an image, we can se that it is composed of squares that we call pixel.
Each pixel is composed of only one color.
All colors can be created with a mix of red, green and blue.
The images have 3 layers!
We call this the RGB standard.
The amount of each color is defined by a value between 0 and 255.
Following an example:
For the grayscale images it is very similar, but we only have one color.
In Python
We can use numpy to create our image.
An image is just a 2D list containing each pixel!
import numpy as np

#  We create an image of 512 by 512 containing only zeros.
w, h = 512, 512
data = np.full((h, w), 0, dtype=np.uint8)
Now we can save this 2D array in a .png.
from PIL import Image

img = Image.fromarray(data, 'L')
img.save('my_graysclae_img.png')
The parameter L specify that we want a gray-scale image.
As you can see 0 is black while 255 is white.
Activity
Modify the values inside this image and see what happens.
Now, if we want images with color we just need to define pixel with our 3 colors.
First, we create a black image.
Each pixel must have the color [0, 0, 0], 0 amount of red, 0 amount of green and 0 amount of blue.
w, h = 512, 512
data = np.full((h, w, 3), np.array([0, 0, 0]), dtype=np.uint8)
img = Image.fromarray(data, 'RGB')
img.save('my_color_img.png')
If we want a green image:
w, h = 512, 512
data = np.full((h, w, 3), np.array([0, 255, 0]), dtype=np.uint8)
img = Image.fromarray(data, 'RGB')
img.save('my_color_img.png')
Activity
Create an image full red.
Do the same thing with blue.
Now, try to create images with different color ( orange, purple, etc…).
Advanced
We will try some things more advanced.
We could create our own image pixel by pixel, but it takes too much time.
So, we will open an existing one and modify it.
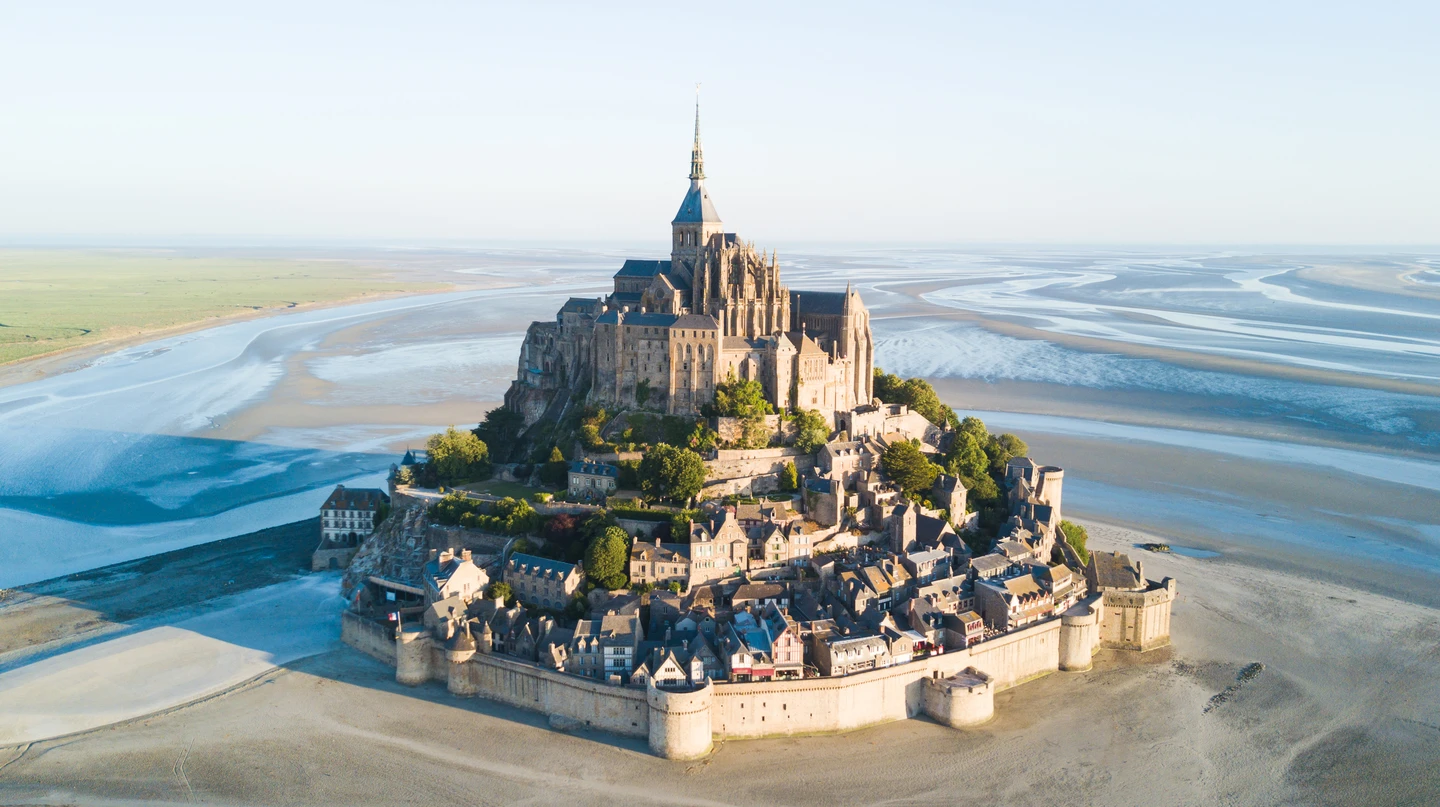
Download the image
Mont Saint Michel.Now we will open it and put it in an array.
img = Image.open("mont-saint-michel.png")
data = np.array(img)
It is that simple.
And as we have a numpy array, we can modify it the way we want.
Activity
Check the following code and try to understand what this code is doing.
   def do_something_fancy(img):
       height = img.shape[0]
       width = img.shape[1]

       mirror_point = int(height/2)

       for x in range(width):
           for y in range(mirror_point):
           top_pixel = img[y, x]
           img[height-y-1,x] = top_pixel

   do_something_fancy(data)
   img2 = Image.fromarray(data, 'RGB')
   img2.save('my_new_img.png')

* Try do the opposite.
Detecting contour
It is possible to detect all the contours in an image.
The idea is to calculate the difference of luminance between two pixels.
The luminance is the average value between the amount of red, green and blue:
If the luminance between two pixels is greater than a value, let’s say 10, then it’s a contour.
So we could just calculate the difference between all adjacent pixel
color them either in black if there is no contour
Or white if there is a contour.
First we implement the luminance function:
def luminance(pixel):
    r = pixel[0]
    g = pixel[1]
    b = pixel[2]
    return (r+g+b)/3
Now, we can implement the contour detection.
def edgedetect(img):
    height = img.shape[0]
    width = img.shape[1]

    for x in range(width):
        for y in range(height):
            if y < height-1 and x < width-1:
            botrt = img[y+1, x+1]
            thislum = luminance(img[y,x])
            brlum = luminance(botrt)
            if abs(brlum-thislum) > 10:
                img[y,x] = [0,0,0]
            if abs(brlum-thislum) <= 10:
                img[y,x] = [255,255,255]
Now try it on the previous picture:
img = Image.open("mont-saint-michel.png")
data = np.array(img)

edgedetect(data)
img2 = Image.fromarray(data, 'RGB')
img2.save('contour.png')