Note: To make the text or printout larger in Code::Blocks:
- Choose "Settings" on the menu bar and select "Editor".
- Click "Choose" at the top right (for Font setting).
- Select "10" (or larger) under "Size".
- Click "Ok" and click "Ok" again.
Code::Blocks Instructions
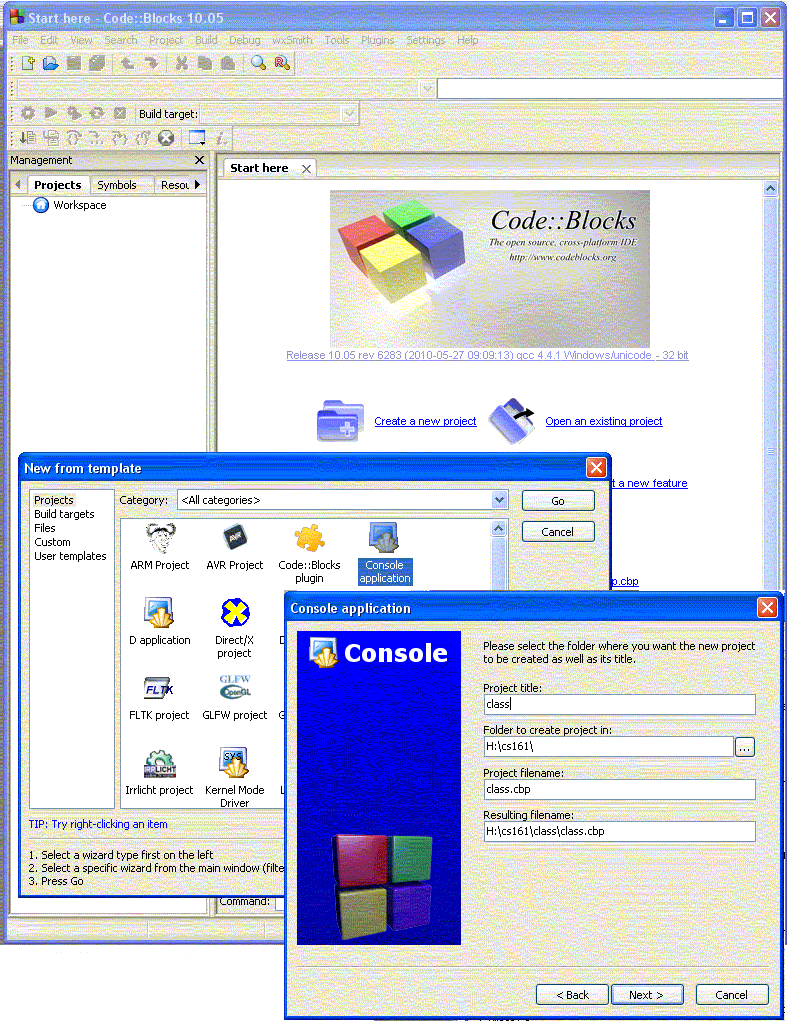
- On the Desktop, open WebFX Applications, open the CodeBlocks folder, and the CodeBlocks program icon.
- Close the tips box and the script console.
- Click the "Create a new project" icon.
- Choose "Console application" and press "Go".
- Select "C++" and press "Next".
- Title your project "CS161" or something appropriate.
- Set the folder to "H:\" or choose the appropriate folder.
- Press "Next".
- Press "Finish".
- Open up the "Sources" folder.
- Double click on the "main.cpp" to open the editor to make changes.
- Click the Save icon or choose "Save File" on the File menu to save the source file.
- Click the Build icon or choose "Build" on the Build menu to compile and link the program.
- Fix any errors if necessary, save, and build again.
- Run the program by clicking on the Run icon or choosing "Start" on the Debug menu.
- Print the output by copying it to your favorite editor
- Right click on the Title bar, choose "Edit" and "Select All"
- Right click on the Title bar and choose "Edit" and "Copy" (or just hit Enter)
- Paste into an editor and print
- Print the program by choosing Print on the File menu, choosing your printer, selecting
Preferences, and making sure the "Original Size" is "8 1/2 x 11".
CodeBlocks is available for free for Windows, Linux, and Mac OS X at
www.codeblocks.org.