Rod Bantjes, “Convex_Lens.html,” created 16 June, 2025; last modified, 24 June, 2025 (https://people.stfx.ca/rbantjes/).
How does a Convex Lens work?
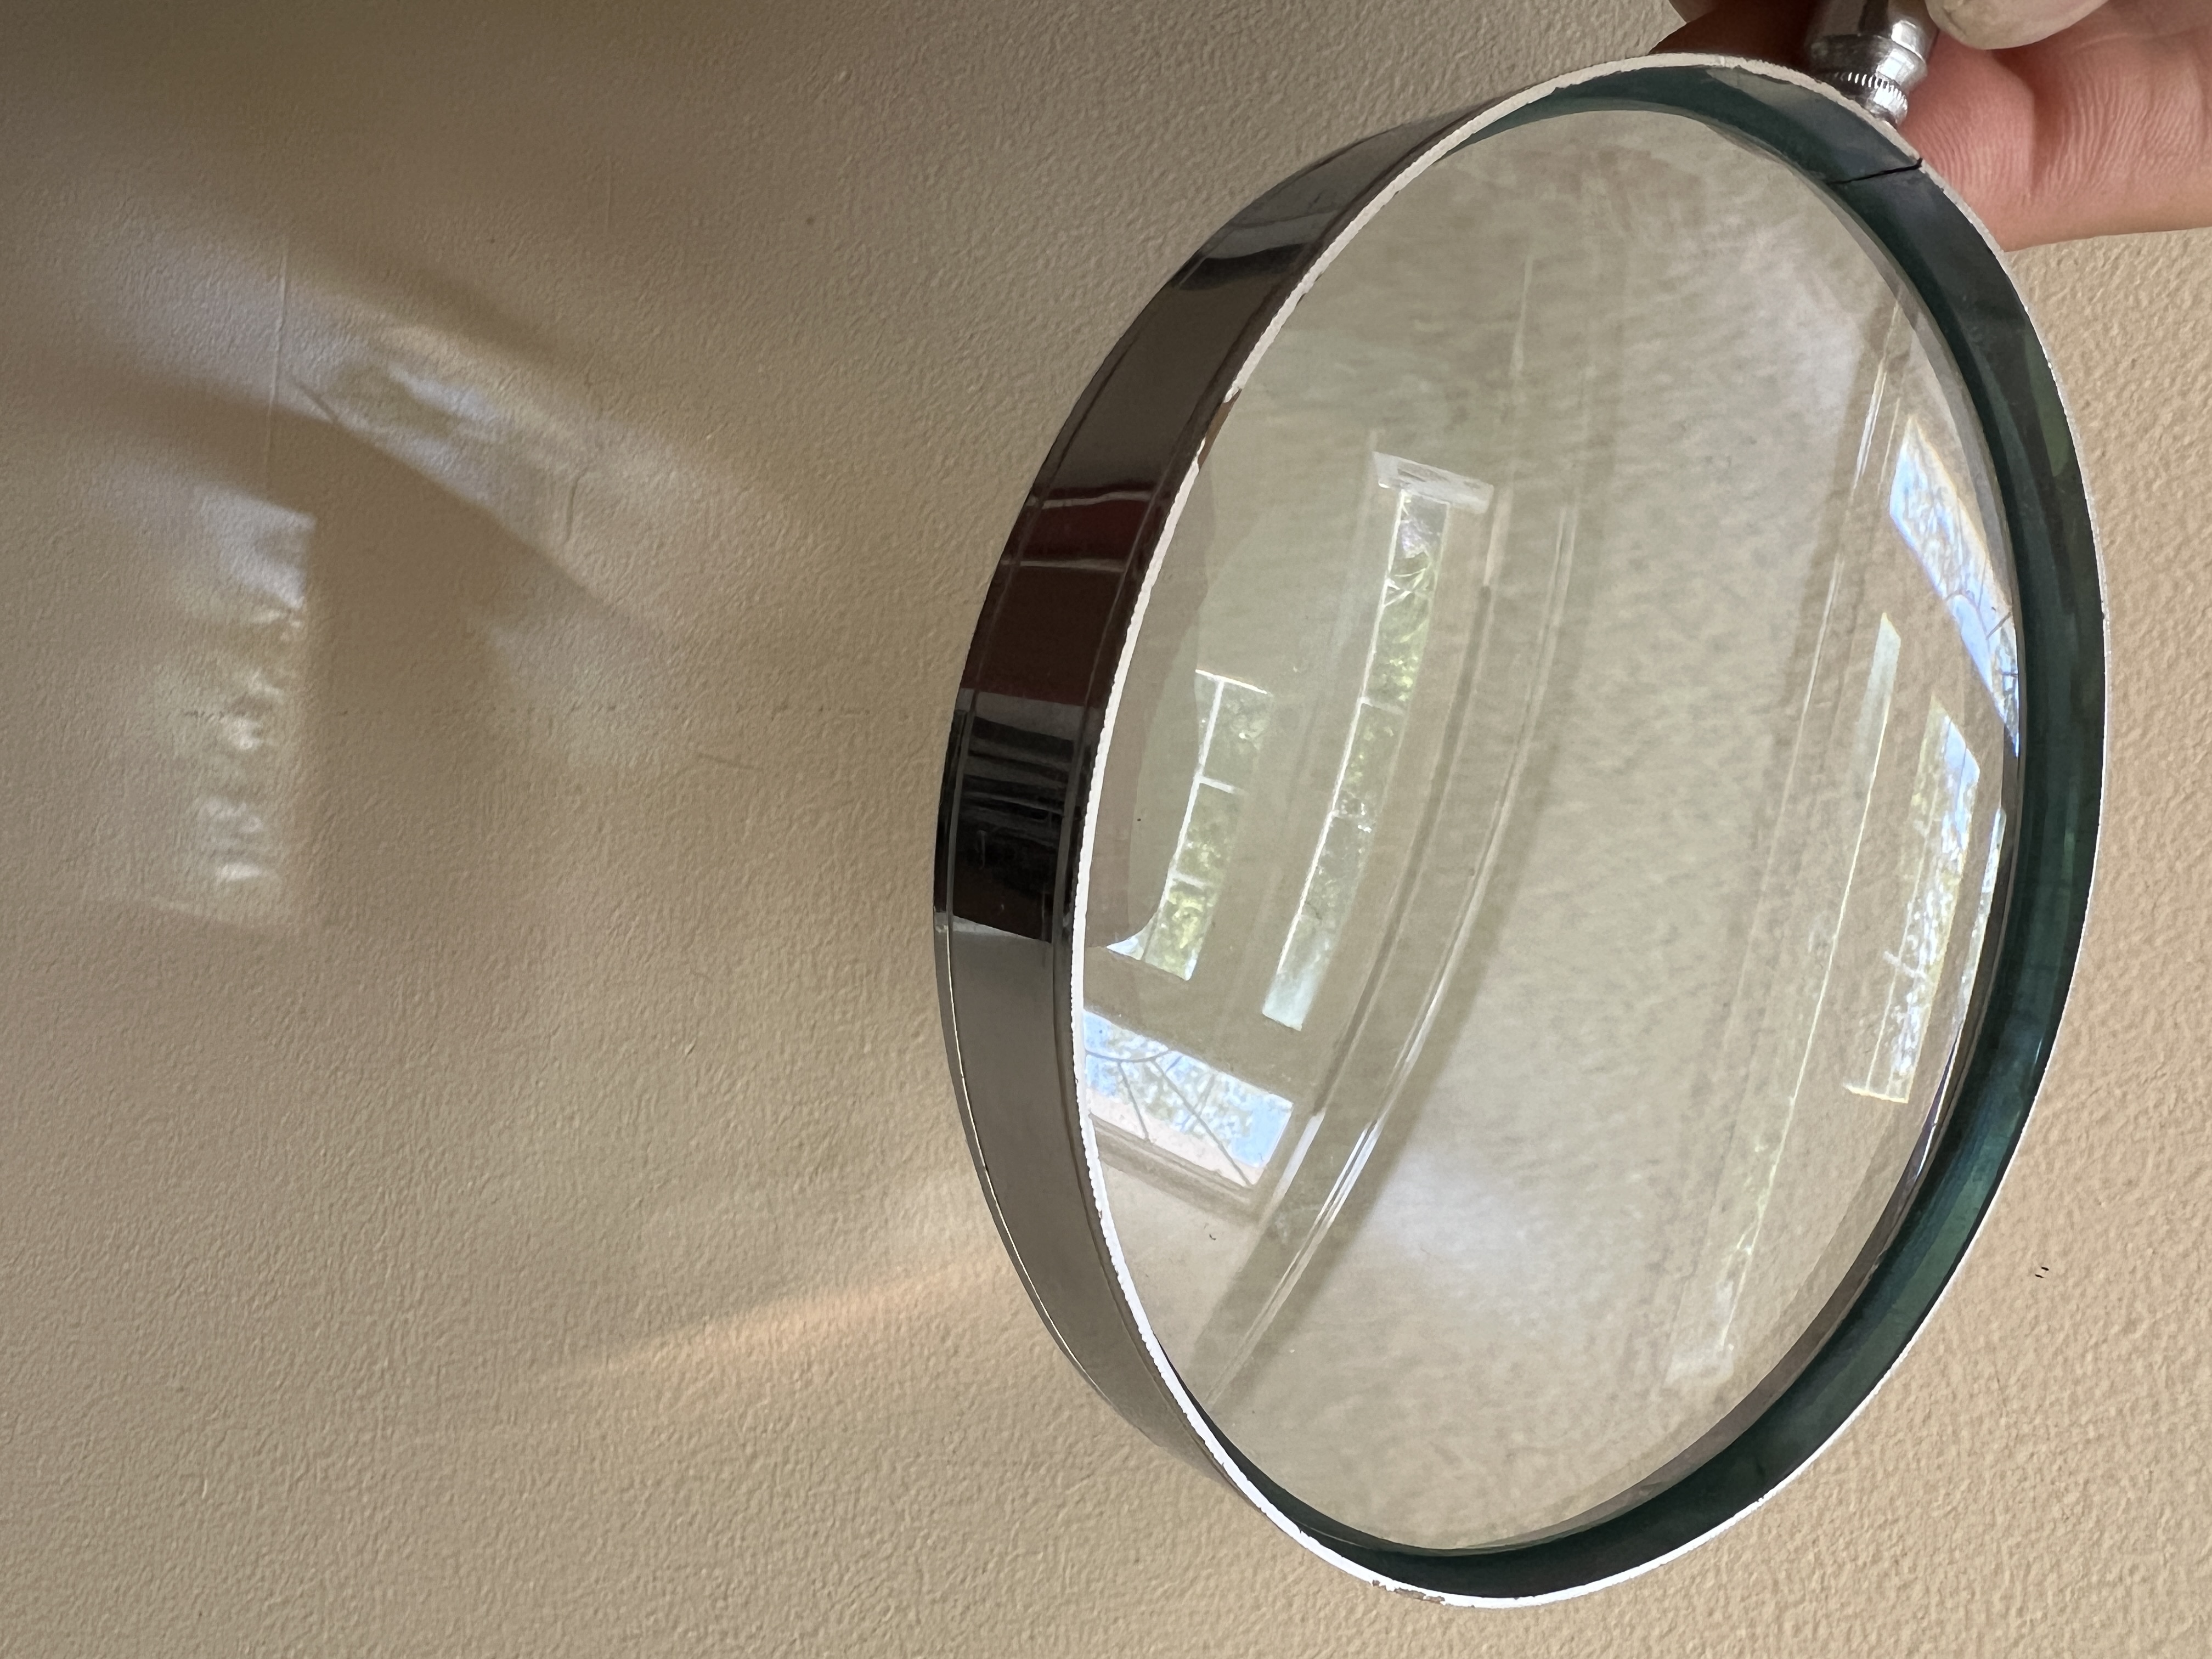 |
Figure L.1 – Biconvex Lens |
| This is a magnifying glass whose lens is both reflecting a scene and casting a distorted image of it on the wall.
Photo © Rod Bantjes, 2025. |
 |
Figure L.2 – Camera Obscura Image |
| Claire in a room-sized camera obscura fitted with a biconvex lens, 2021.
Photo © Rod Bantjes, 2021. |
A convex lens can be put to different uses: It can be a 'burning glass' focusing the sun's rays to create intense heat; a magnifying glass making objects appear larger when we look through the lens; a camera lens, creating an upside-down image on a screen; and finally, a viewing-lens to enhance the 3D effect of prints and photographs. In all cases it is bending the path of light to affect what we perceive, but in each case the particular effect must be explained differently. Sometimes explanations go astray by confusing these four functions; here we will sort them out.
In Figure L.2 the inverted image is produced with a single biconvex lens with a focal length of 50cm projecting onto a ground glass screen. What you are actually looking on your screen is a second image recorded in my iPhone 13 camera and reassembled on your digital device. An even more important image for understanding how lenses affect what we see, is the image currently projected on your retina.
A lens is 'biconvex' if the front and back surfaces are curved outwards. This was the typical form of a convex lens until the 19th century. A 'plano-convex' lens is a lens with one surface curved outward and one surface flat. They both can be used to focus light.
Camera Lens:
 |
Figure L.3 – Pinhole Camera |
| Light entering a darkened room through a small hole without a lens was the earliest sort of camera – camera obscura means 'dark room.' |
 |
Figure L.4 – Pinhole Image |
| This is the same room and scene as in Figure L.2. Note how much darker the pinhole image is.
Photo © Rod Bantjes, 2021. |
Lenses were first used to make camera obscura images brighter. Any small hole, 1/4 inch (6 mm) or less in diameter, that admits sunlight into a darkened room, will cause an image to be formed. It is worth trying – it forms on every surface in the room. If you put a screen or ground glass in front of the hole you get a recognizable, but inverted, picture of the outside world (figures L.3 and L.4).
Figure L.3 is a ray diagram explaining how the camera obscura image is formed. Every surface in the garden is reflecting rays of sunlight in all directions. For example, C at the tip of the urn and A, the seated person's toe. As the rays fan out from C, the pinhole in the wall of the building blocks out all but one. You can see that ray carry on through the hole and strike the interior surface at E where it marks a corresponding point of light with the same colour and intensity as the original.
The ray from the tip of the person's toe, A, strikes the screen at G. Likewise for every point in the outdoor scene. In this way the little hole miraculously organizes all the rays into an image on the screen – an image that is upside-down and reversed left for right for reasons that should be evident from the ray diagram.
Because the hole has some width, it actually admits a narrow cone of light (think of a triangle between the light's point of origin and the two edges of the opening. The larger the opening, the wider the cone. If it gets too wide, the marks of light on the screen overlap too much and you get a blurry image. Think of a crisp line between white and black – cones from white points will overlap cones from black points creating a grey blur. You can make the image more crisp with a smaller hole; but at the same time that the hole gets smaller, the image becomes darker (see Figure L.4).
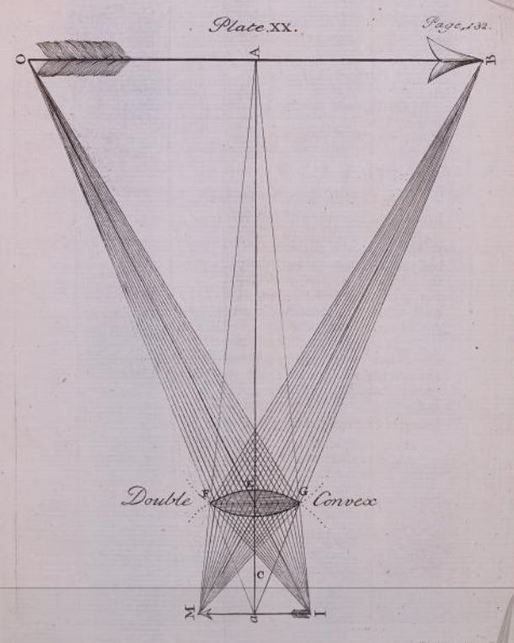 |
Figure L.5 – Lens Focusing Light |
| Source: Martin, Benjamin, A New and Compendious System of Optics, (London: J. Hodges, 1740), Plate 20. |
The lens was the solution for making the camera obscura image brighter while remaining in focus. Imagine that the biconvex lens in Figure L.5 has replaced the 'pinhole' of a camera obscura. From the point B at the tip of the arrow a wide cone of light strikes the lens (the triangle BFG). The glass of the lens refracts the light, bending it so that it refocuses at point M.
Similarly for the nock of the arrow at O, light from which gets focused at I. All the other points along the arrow are refocused in this way so that if you put a screen in the camera at MaI, you will see projected on it a perfectly focused image of the arrow.
Because the diameter of the lens is much greater than the pinhole, it admits much more light and produces a brighter image (see Figure L.2 vs Figure L.4).
Burning Glass:
 |
Figure L.6 – Burning Glass |
| When the image of the sun is in focus it burns the wood.
Gif image © Rod Bantjes, 2025. |
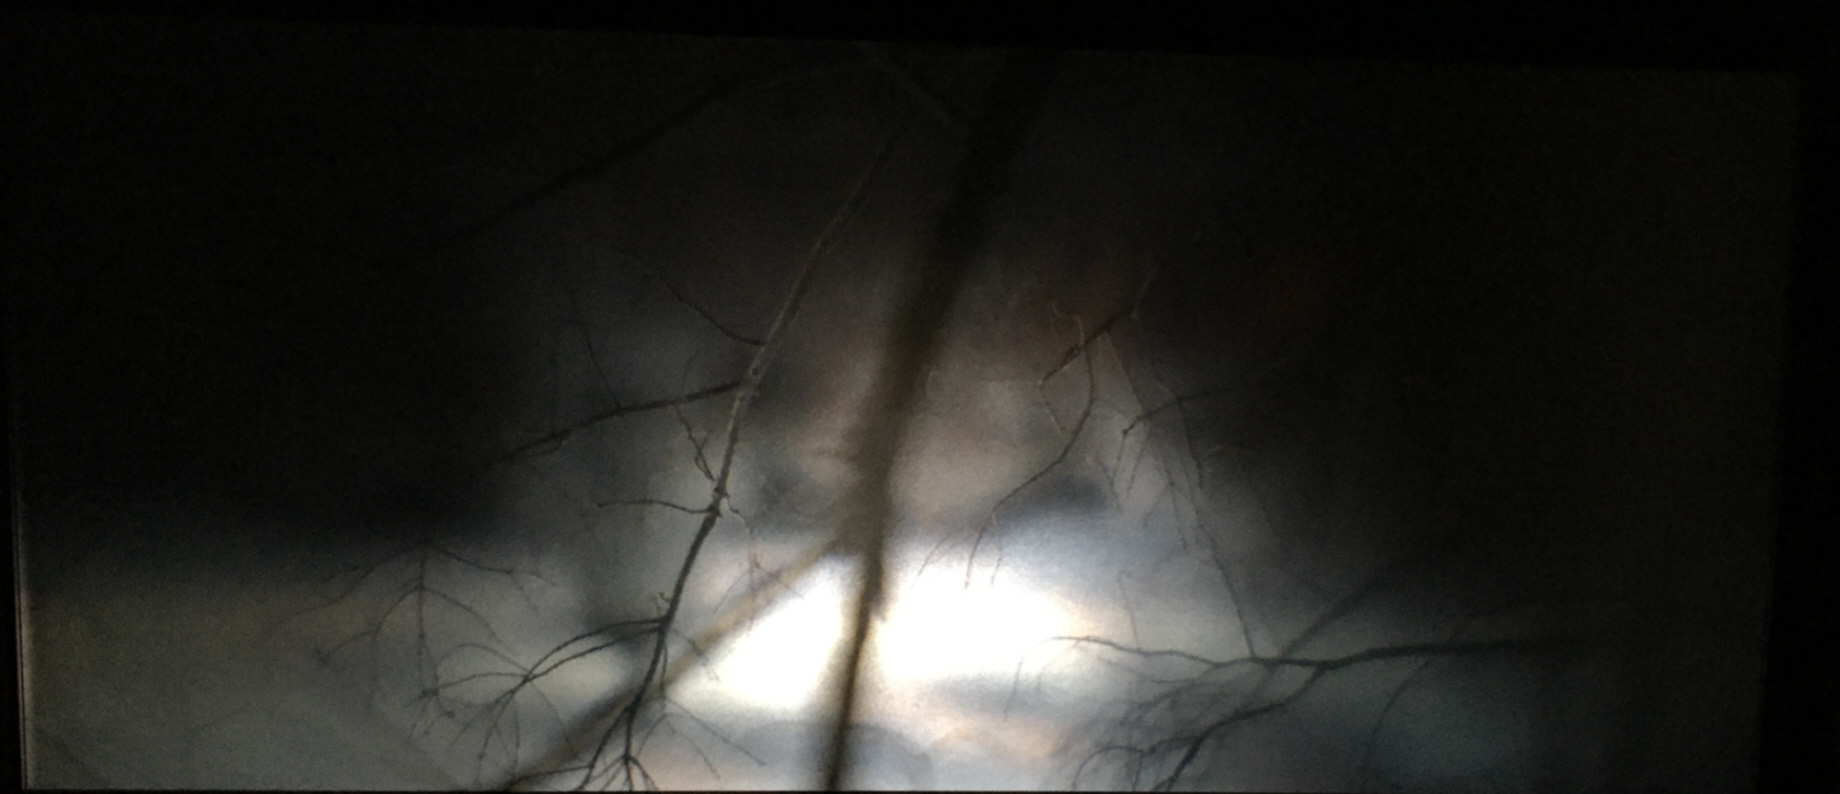 |
Figure L.7 – Camera Obscura Image |
| This is the same scene as Figure L.2, except with a closer focus achieved by bringing the image-plate further away from the lens.
Photo © Rod Bantjes, 2021. |
A burning glass focuses a small image of the sun and in so doing concentrates the heat of the sun's rays. Watch how the instant that the sun comes into focus in Figure L.6, the wood starts to smoke. The principle is the same as focusing an image in a camera.
A wide lens (to gather as much light as possible) and a short focal length (to produce as small an image as possible) is best for a burning glass.
Note how in Figure L.6 the lens is acting both as a burning glass and a magnifying glass simultaneously. It is projecting a diminished image on the piece of wood. At the same time, if you look through it, it is producing an enlarged image on your retina (actually on the iPhone image-plate which is the stand-in for your retina here). The point is, a second lens is needed to produce the enlarged image that you see through the lens. The first lens is not making the image, it is just bending the light in a way that will affect the image that your eye makes – that is important for understanding how a magnifying glass works (next section).
Note on Focal Length: Given the great distance that the sun is from us, its rays reach us effectively parallel. The point at which a lens brings these (or any) parallel rays to a point of focus is its focal point, and the distance between the lens and this point is its focal length (see an illustration). Light from closer objects can be brought to focus further from the lens. In Figure L.2 the distance from the image-plate to the lens is roughly the focal length of the lens. The distant building is in focus. To focus on the trees just outside the darkened room (Figure L.7), the plate must be moved much further back. At this point the building is completely out of focus.
Magnifying Glass:
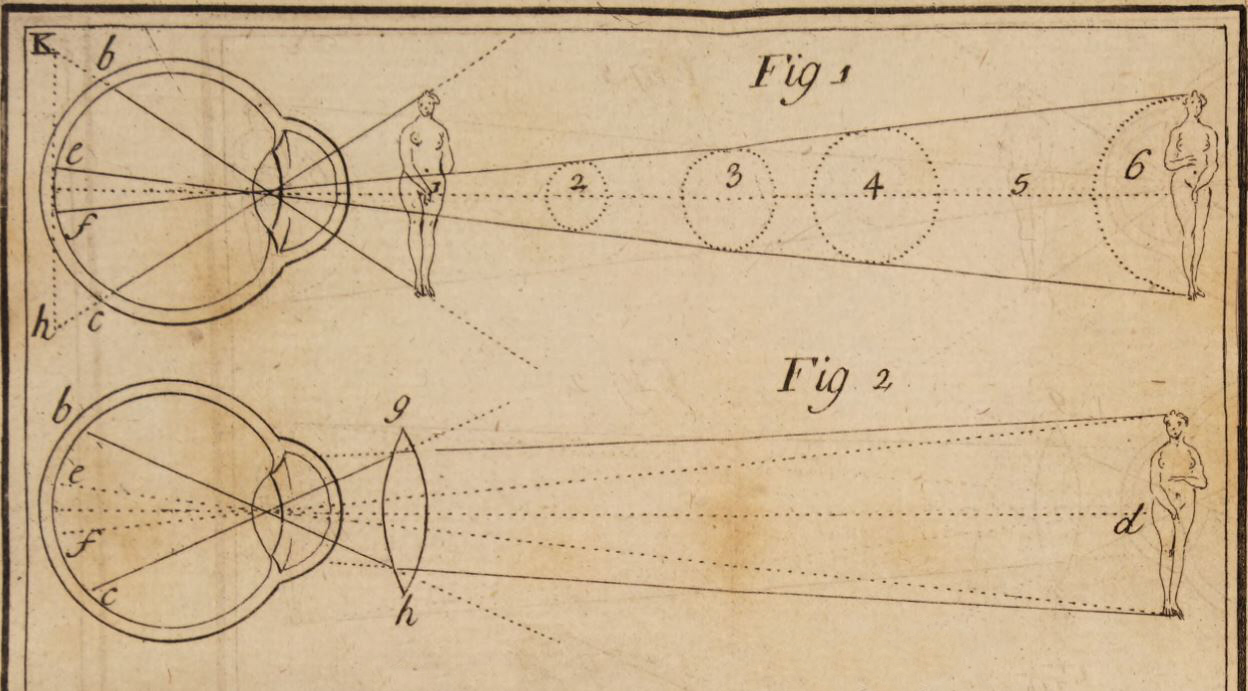 |
Figure Le Cat 1 and 2 – Magnifying Lens |
| Source: Le Cat, Claude Nicolas, A Physical Essay on the Senses (London: R. Griffiths, 1750), 221-2. |
Claude-Nicolas Le Cat (1700 - 1768) gives the best explanation for how, when we look through a biconvex lens, objects appear magnified. If you look online, you can still find a surprising amount of confusion on this subject – abstract ray diagrams with “virtual images” represented right-side up or upside down. As an answer to the question of what we see looking through the lens rather than side-on to the lens, such diagrams are misleading and mostly false.
What we need to know is what the lens does to the size of the image on the retina. Le Cat, who was a surgeon, thinks about the problem in very concrete physiological terms. In addition to the biconvex lens, he includes in his diagram (Le Cat 1 and 2) the organic lens of the eye and the retina.
From the point at the top of the female figurine's head a whole bundle of light rays fans out and then is refocused by the lens of the eye to a point at f on the retina (Le Cat Fig. 1). We are not interested in this fan of rays or in how the lens focuses them (this is a different function of a biconvex lens that will confuse if we don’t set it aside for now). Le Cat has eliminated all of them from his diagram except for what is called the “centric ray” that he indicates with a solid line (to simplify the diagram he is treating the eye as though it functioned like a pinhole camera).
We will pay attention to two centric rays: one from the top of the figurine's head and one from the bottom of her feet. These take the measure of her height. Note the paths of the two rays in his Fig. 1. They strike the retina at e and f. The chord (a line that follows the natural curvature of the retina) ef is the height of the figurine's image on the retina. When you place the lens in the path of light (Le Cat Fig. 2) these two rays strike instead at bc – a much longer chord and therefore a much larger image. That’s how the lens enlarges things as seen from the observer’s point of view.
The lens enlarges but also gives greater detail in the image. Think of the retina, like René Descartes did, as a recording surface made up of a grid of thousands of light-sensitive nerves. Each nerve creates what we might in the digital age think of as a pixel. The larger image bc will have many more pixels, so the image-definition will be greater and the details clearer. That is why when we look at an insect with a magnifying glass (which is simply a biconvex lens) we can see details that are not visible with the naked eye.
Viewing-Lens for an Optical Box:
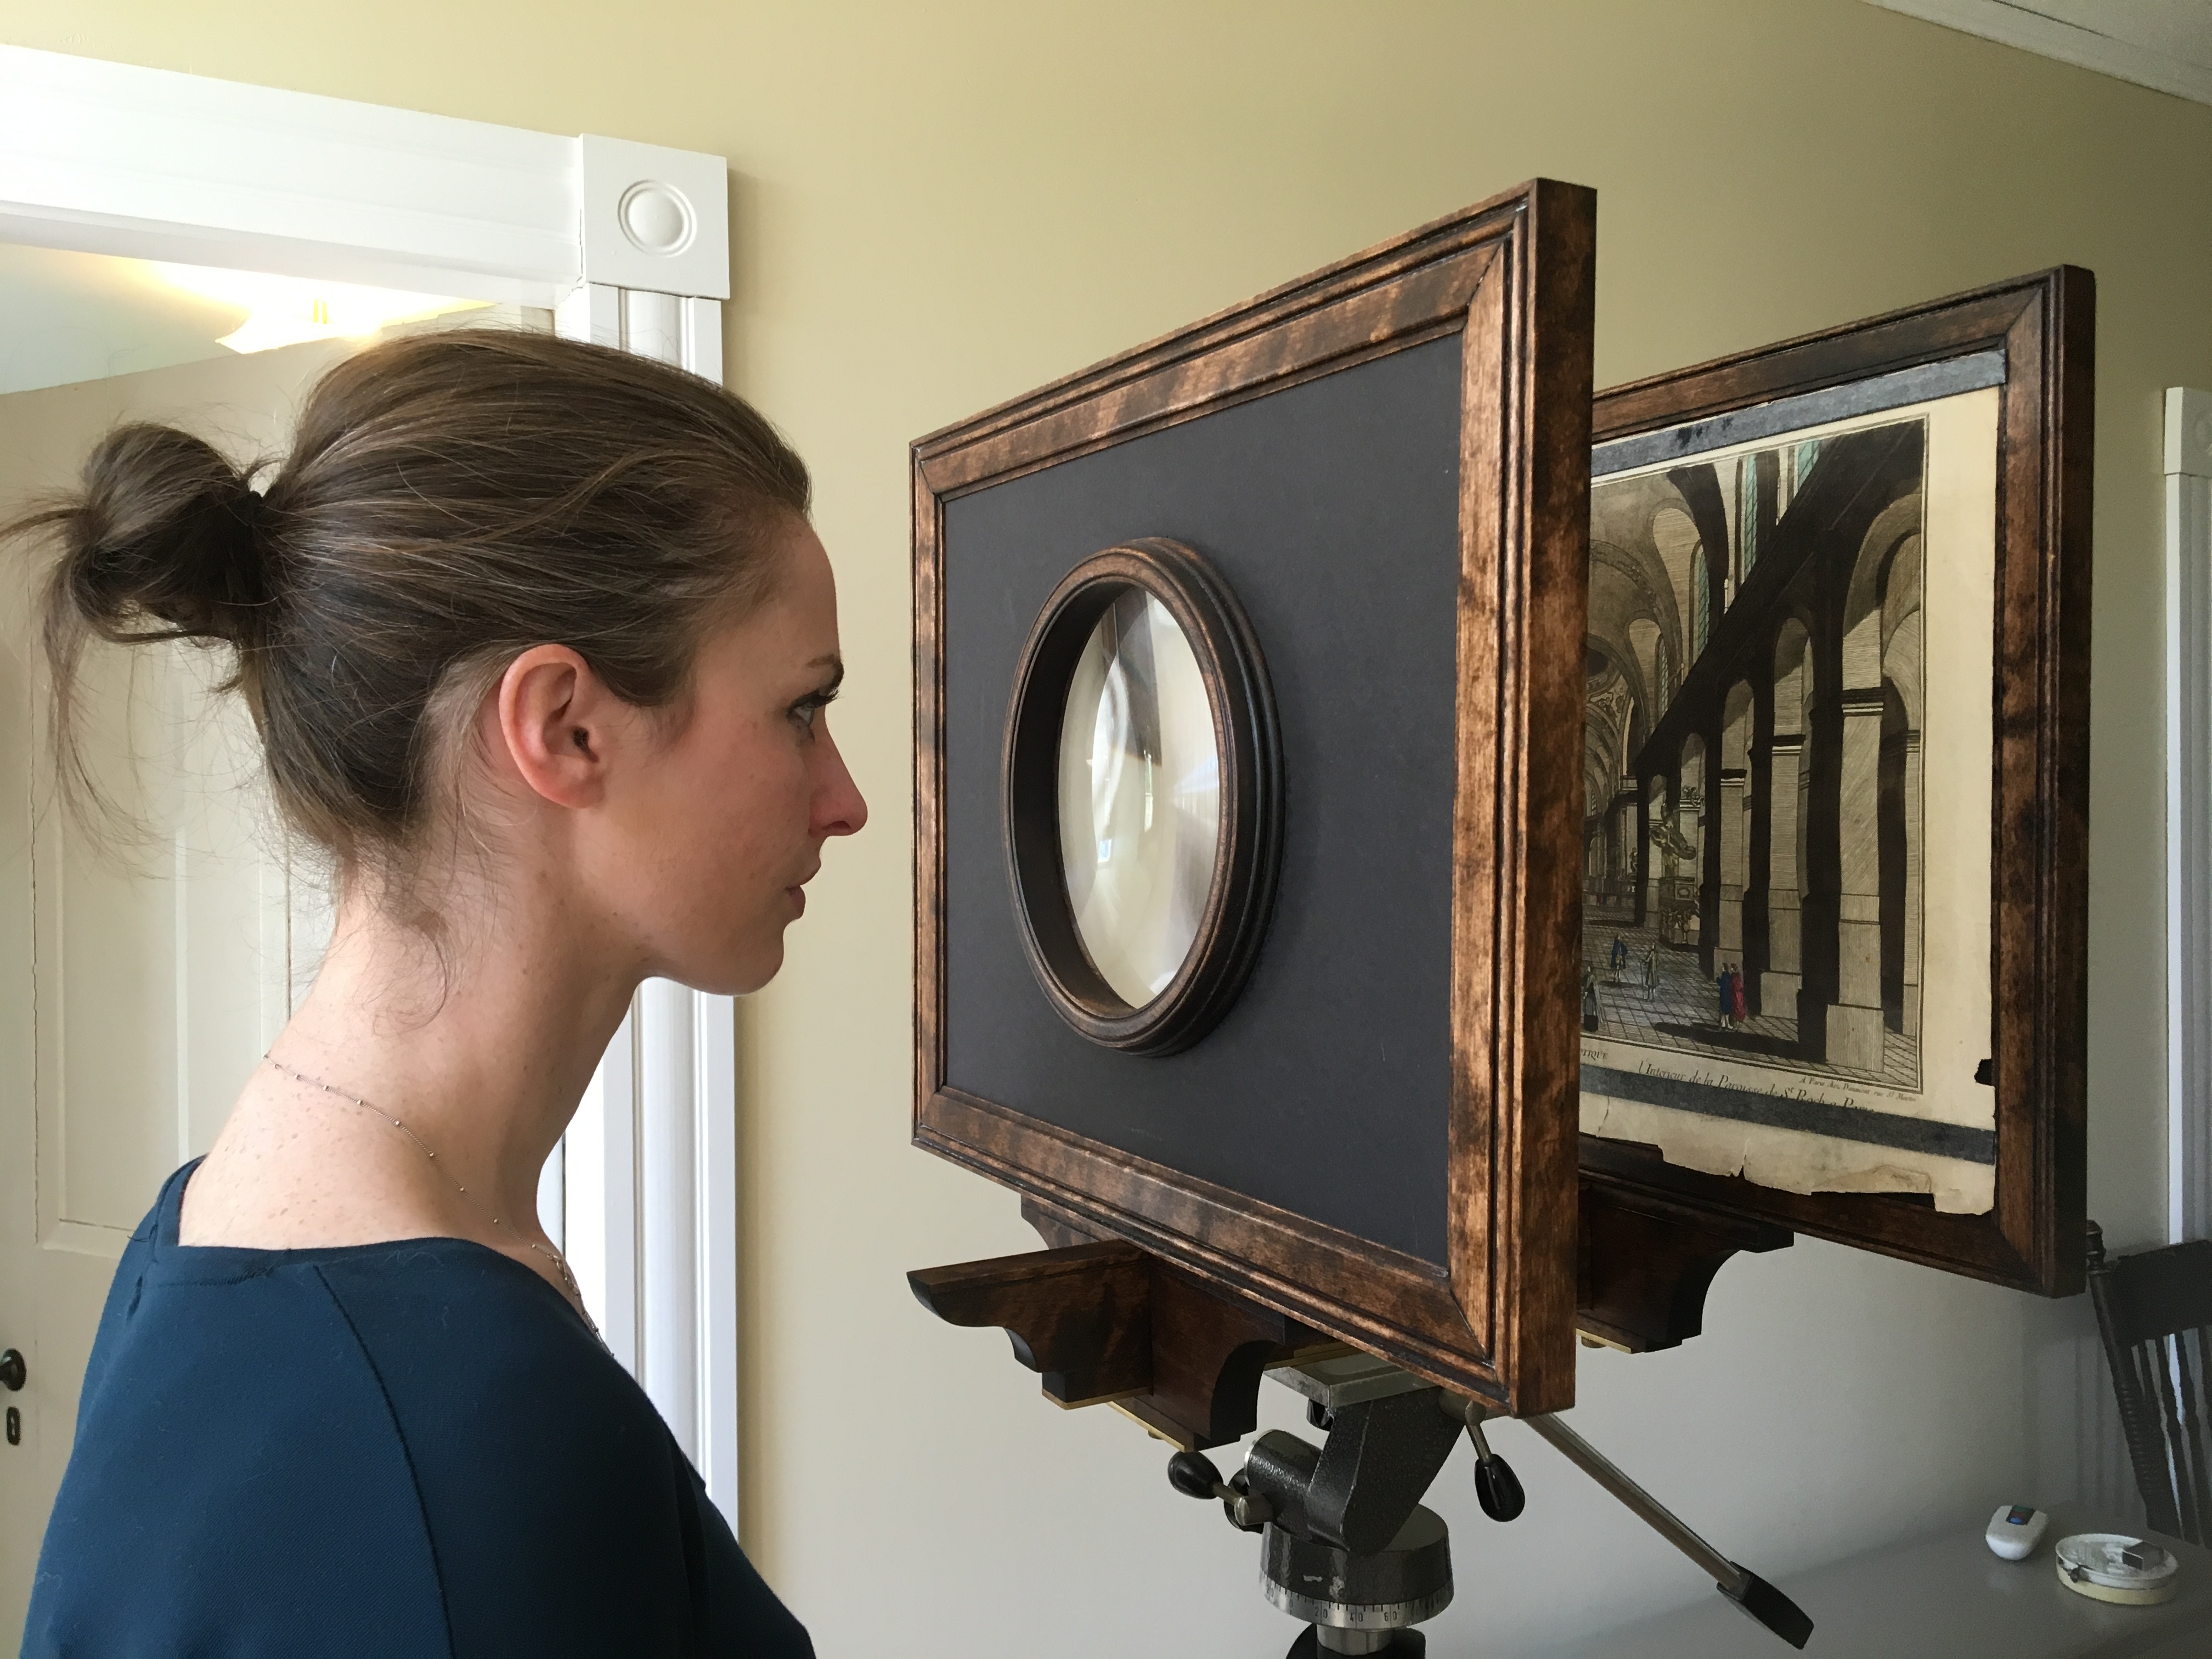 |
Figure L.8 – Viewing-Lens |
| Maica viewing a vue d'optique through a lens.
Photo © Rod Bantjes, 2018. |
At some point, perhaps in the 17th century, people decided that a convex lens enhances the 3D illusion of a perspective print.
Eighteenth-century writers thought that the effect works best when the lens redirects the path of light so that the eyes become parallel when looking at a print. Click here for an explanation of this binocular effect. The eyes will be parallel if the distance between the print and the lens is equal to the focal length of the lens. Makers of optical boxes follow this advice more-or-less. Although focal length determines this requirement, it has nothing to do with focusing an image. No matter what distance the print is from the lens, there will be two perfectly focused images of it – one on the retina of each of your two eyes. The lens just changes the angle that your two eyes converge to see the print as a single image.
People in the 18th and 19th centuries believed that the effect also worked if you look through the lens with only one eye. Here is an explanation of the monocular principle. The 3D enhancement that the monocular lens gives in this way is very minimal.
The 3D effect of prints and photographs seems to be enhanced by a convex lens, but other psychological and perceptual principles may also be at play. Click here for additional optical explanations. For a more comprehensive explanation that argues for an essential role of intention and imagination, see Bantjes, Rod. 2021. “The Optical Machine’s Asynchronic Progress.” Technology and Culture 62(4):1119-42.
Binocular Lens: Given the important difference between the monocular and binocular effects, I distinguish between binocular and monocular lenses. Binocular lenses are wide enough to see through with both eyes.
Monocular lenses are too narrow (measuring under 6 cm in diameter) to see through with both eyes.